Having successfully seized the river crossing at Dreibrücke, the French General Lebasque finally had an opportunity to escape his Prussian pursuers. Faced with the options of a long overland march to rejoin Davout and then take part in further fighting across Europe, or a sea voyage home and Christmas 1813 with the family, Lebasque chose the watery option and turned his remaining forces towards the North Sea coast. All he had to do was find a harbour with enough ships in port, persuade the captains to take his troops on board and sail to France, and do all this while holding off any Prussian attempts to interfere.

The first and second of these were achieved with the judicious application of money looted on the way through Germany and the more profligate application of the bayonet to the recalcitrant members of the local populace and seafaring community. Now it was time to get the men aboard ship before the Prussians caught up with him.
Which is where we rejoin the story.
Lebasque’s march to the coast had seen him reconstitute his forces with the troops who were guarding his lines of communication, allowing him to muster two full divisions of infantry, now battle hardened. However, he lacked any cavalry, the men having already boarded ships as their mounts provided the last few meals, and his own drive and panache had seemingly been exhausted by the retreat. (I rerolled both sides on the MdE Army Generator, hence the need to explain differences compared to the previous battle.)
The pursuing Prussians, driven on by a Baron von Wreckedoffen apparently inspired by his victory at Stavkstadt, outnumbered them significantly, but the terrain favoured the defender.
French (Blue)
1 General Capable
1 Infantry division of 3 brigades Trained SK1, Trained SK1, Veteran SK0
1 Infantry division of 3 brigades Veteran SK2, Trained SK1, Veteran SK1
2 battery Foot Artillery
Lebasque gets 1d6+3 Tempo points each turn (1 for each for the two formations plus one for being Capable.)
Prussians (Red)
1 General Capable
1 Infantry brigade of 3 regiments Veteran SK1, Trained SK1, Trained SK1
1 Infantry brigade of 3 regiments Veteran SK2, Trained SK1, Trained SK1
1 Infantry brigade of 3 regiments Veteran SK1, Trained SK1, Trained SK1
1 Cavalry brigade of 1 regiment Cuirassiers Veteran, 1 regiment Dragoons Trained, 1 regiment Uhlans Trained
4 batteries Artillery (1 per brigade, with the cavalry having a horse battery)
Von Wreckedoffen gets 1d6+5 Tempo points. I will used the same solo system of bidding as in Scenario 1 with the French bidding 1d4 each turn and the Prussians 1dAvg.
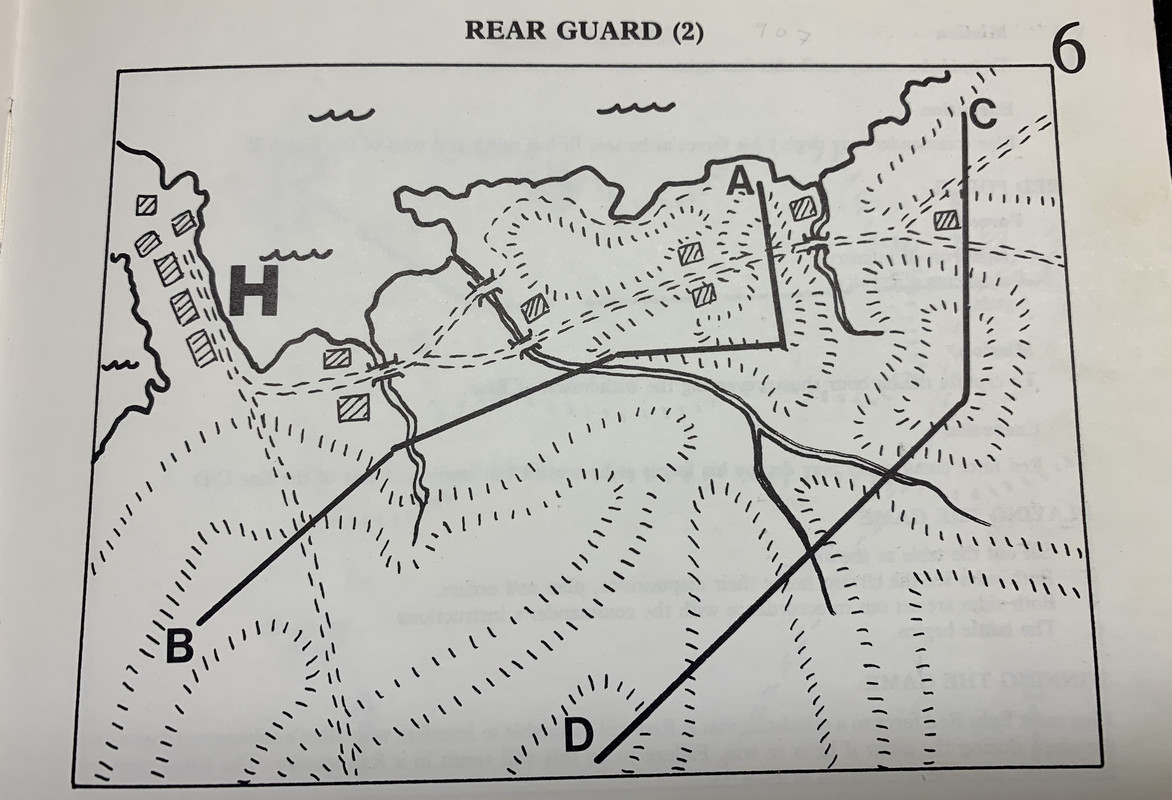
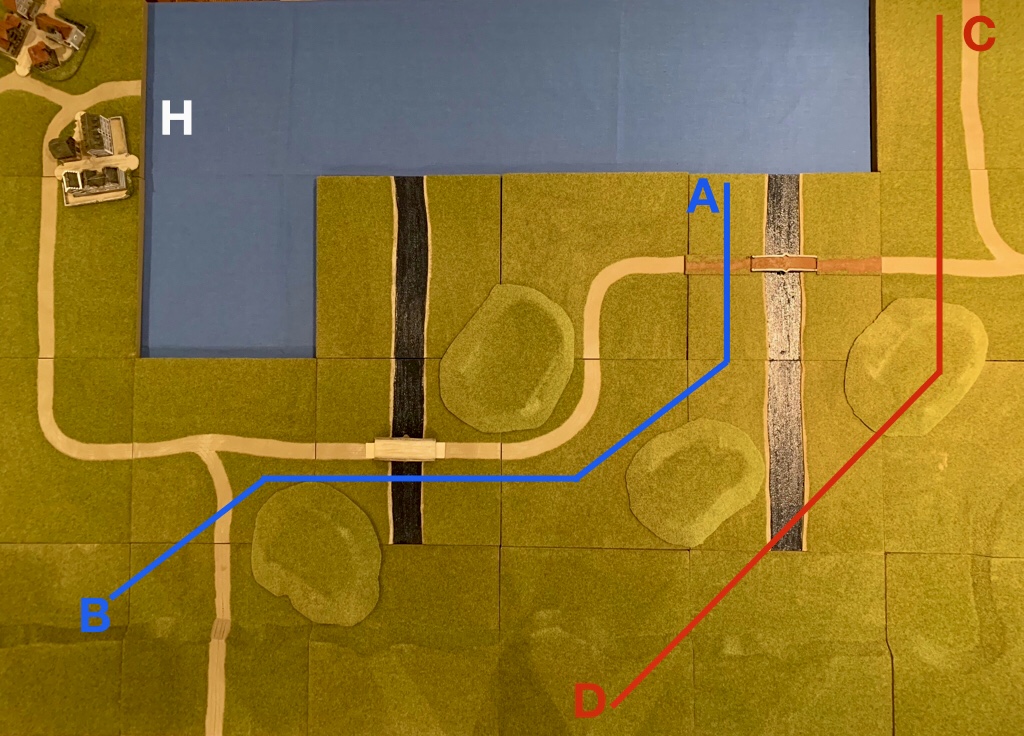
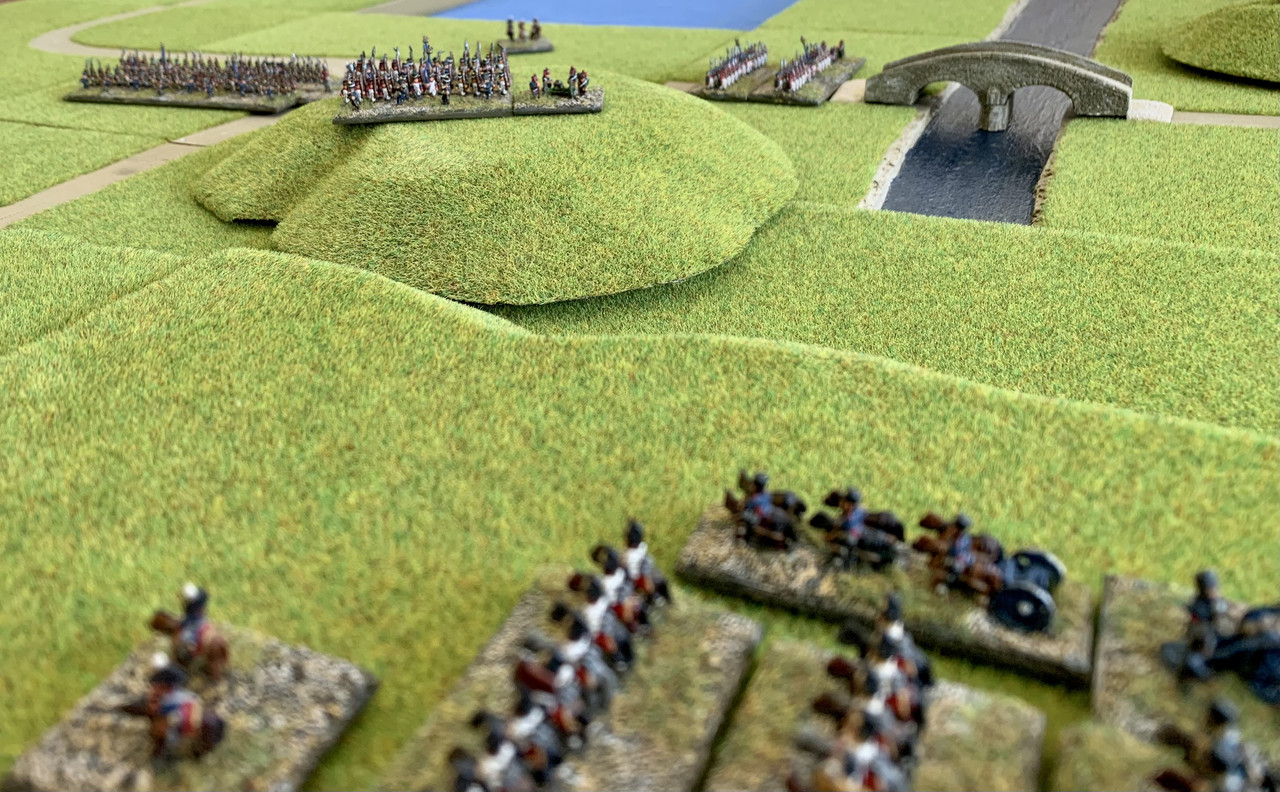
This is Grant’s map. The French deploy north and west of the line AB and must hold the port at H by fighting the Prussians to a standstill. The Prussians deploy south and east of CD and must capture the port to achieve a victory.
My (rather simpler) table looked like this. Not quite as hilly as Grant’s map. In fact Mrs Dog’s comment on passing by the table was: “It looks like Holland.”
“Not if you’re 6mm tall it doesn’t” I refrained from responding. Discretion over valour always being the preferred marital course of action.
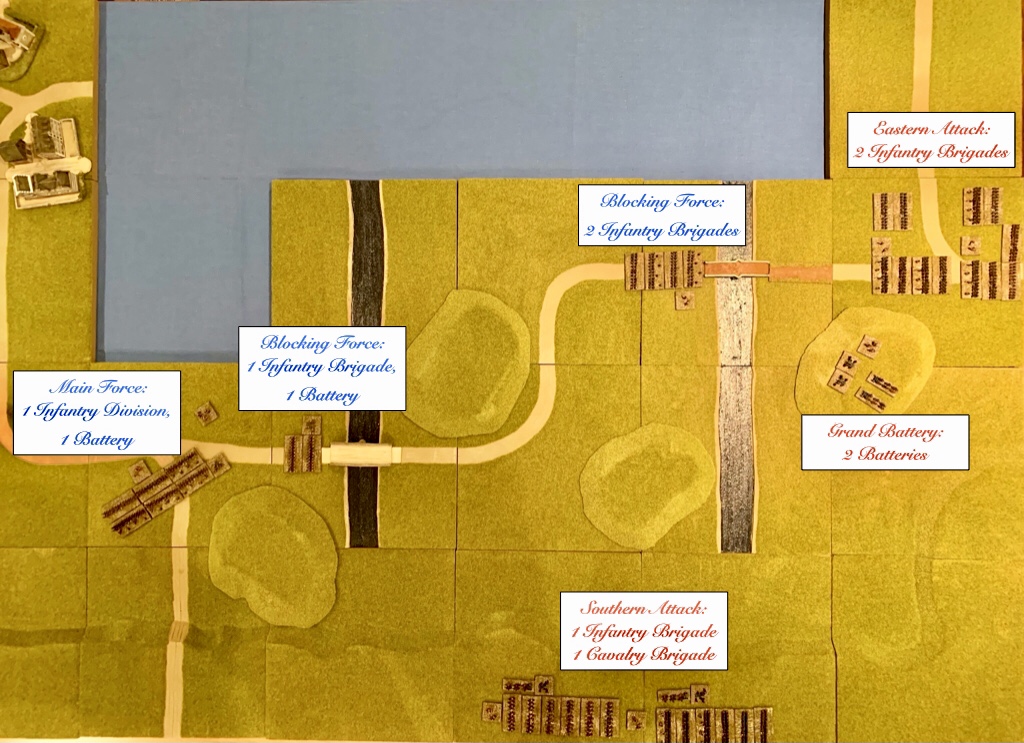
Von Wreckedoffen had enough troops to attack from both the east and south. The hills to the south would slow movement, but with any luck the arms of his assault would arrive together and crush the French, rather than allowing them to defeat each in turn.
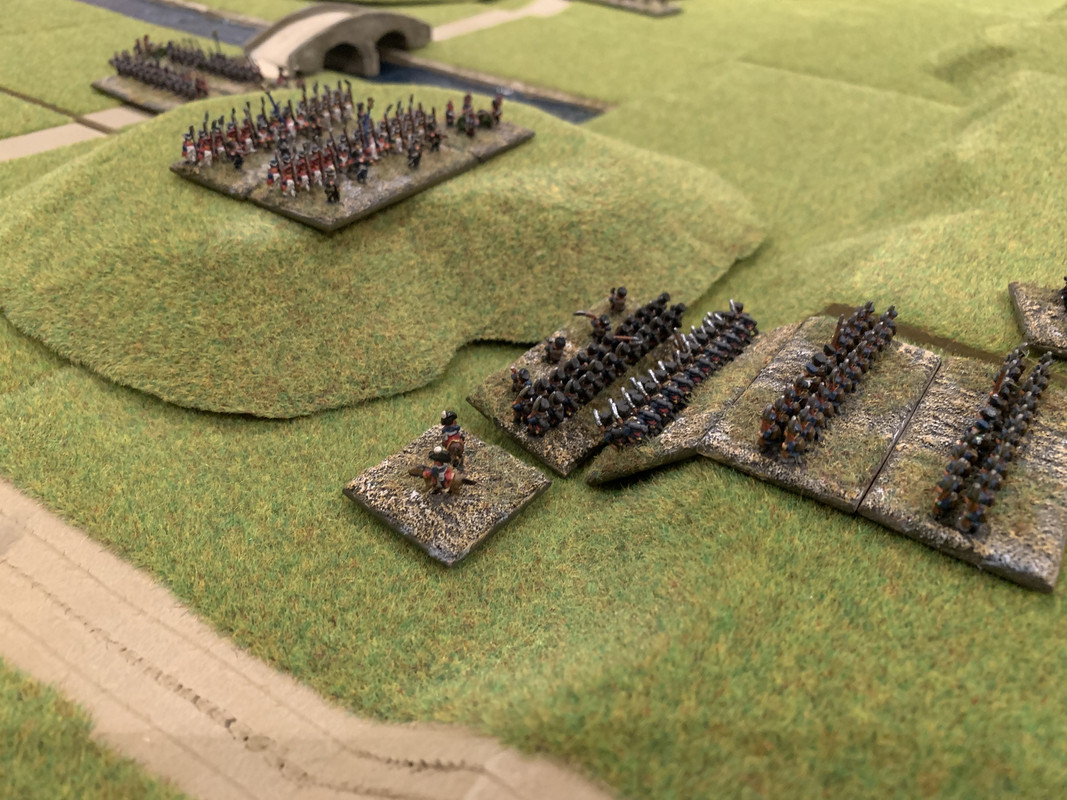
Deployment complete, this is how things looked.
Turn 1
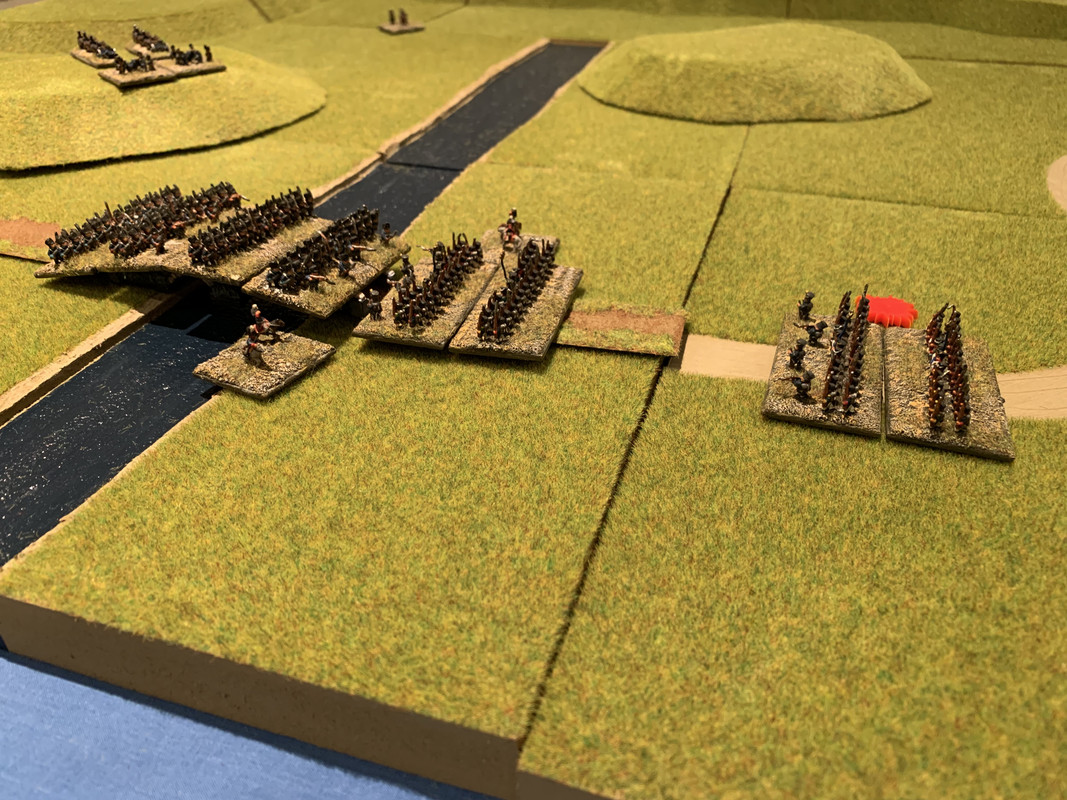
The Prussians won the initiative, and when the grand battery on the hill sent one of the French brigades at the eastern bridge reeling back with shock, von Wreckedoffen seized the opportunity and sent two regiments of foot across the bridge. Despite the disruption of crossing the bridge, they pushed the French back and then routed both brigades. To the south, the advance of this arm of the assault was set in motion.
Turns 2-5
The inexorable Prussian advance continued. The grand battery moved up onto a hill overlooking the western bridge and began to bombard its defenders. The victors of the eastern bridge hurried to repeat that feat at the next bridge, preceded by a mob of fleeing Frenchmen who temporarily disrupted their comrades defending the bridge, before continuing their headlong flight to the harbour.
To the south, the Prussians arrived in front of the defending French division, and drew themselves up ready to attack, the cavalry opposite the two brigades in the valley, the infantry facing the hill.
Both sides exchanged desultory cannon fire, but with no discernible effect.
Turn 6
At the western bridge, von Wreckedoffen launched his assault. Expecting a repeat of their previous success, the Prussians charged across the bridge only to be held, and then routed, by the French. To the south, things did not go much better. The Prussian artillery managed to shake the French brigade on the hill, but when the infantry advanced to take advantage, they were held and then repulsed by the veteran French infantry. Fortunately though they retired in good order, ready for another attempt.
Despite these setbacks, von Wreckedoffen could feel reasonably happy. He had lost only one regiment to the two brigades the French had lost and he had already seized the first bridge. The subsequent assaults might have been rash, but there was plenty of time to bring up reinforcements and crush the French exactly as he had planned.
Turn 7-10
The Prussians took these turns to bring up reserves and prepare for fresh attacks. The French could do little but watch and wait. Again, artillery fire by both sides was largely ineffective.
Turn 11
The assault on the bridge was still being prepared, but in the south, having shaken the French with artillery fire again, the Prussians once more more plunged into the valley and up the hill. Once again they bounced off the French formation and were forced to withdraw.
Once more into the valley of death recoil
Turn 12
Finally the Prussians were ready to launch simultaneous attacks on the bridge and the southern hill. The artillery had failed to shake the French defenders, but von Wreckedoffen couldn’t afford to wait any longer. At the bridge the attacking Prussians were held and then routed, the supporting regiment also being pushed back by the pursuing French.
To the south the combat went back and forth, but once again the Prussians ultimately fell back, this time thoroughly shaken by the ordeal. Things were not looking good for von Wreckedoffen.
Turn 13
Retaining the initiative, the Prussians made one final throw of the dice. The artillery at the bridge managed to shake the French, and the last remaining fresh regiments charged forward, enjoying some initial success but ultimately being driven back to their starting place by the redoubtable French defenders.
In the south, the cavalry brigade launched itself at the, so far, unengaged French infantry brigades. The cuirassiers, with horse artillery support, were unable to make much impression on the brigade facing them, while the dragoons and uhlans initially had some success, but ultimately were broken by volleyfire from the battalion squares.

With the dragoons routing and multiple shaken infantry regiments, the Prussian Force Morale failed. Lebasque and his men would be boarding their ships unmolested.
Observations
Another fun game, though I’ll admit, the long stretches of marching in the middle might have tested the patience of a live opponent. The luxury of being able to leave the game standing meant I played it in short bursts over several days, so only noticed how the action occurred in three distinct phases with the benefit of hindsight while writing it up.
MdE really does give me the feel of a Napoleonic battle. The French rolled really well at the vital moments, breaking Prussian units just when they needed to. But sudden breakthroughs after much back and forth is certainly what you read about in contemporary accounts.
I think I may be getting the hang of artillery, which at least played more of a role in this game, and its impact really is limited by the rules. When artillery fires in the bombardment phase it is almost as likely to suffer an adverse consequence as it is to hurt the enemy. The most likely outcome is no effect at all, so it proves most effective as a support in combat.
Cavalry charging unshaken infantry is definitely a bad idea in MdE, as it was in real life. That said, the final desperate charge by the Prussians was only a decent die roll away from success that would have rolled up the entire French line and changed the outcome. (There’s a gag here about ‘Neysayers’ but I’m too tired to figure it out. Make it yourselves.)
This entry will be published on the one year anniversary of my first battle report, so that’s five games in a year, giving an expected duration for my ‘year with Charles’ of just over a decade. That seems about right, though I always hope to pick up the pace.
Work does continue on my WWII forces. The British for Scenario 5 are done and I’ve done five vehicles and 41 infantry for the Germans, but there are a lot more vehicles to go for them.

Meanwhile, in real life the employment picture is not rosy, but I am determined to make good use of the unwelcome spare time. So, with the MdE rules still fresh in my furry head, we’ll head for Scenario 7 and some more 6mm Napoleonic action.
No comments:
Post a Comment