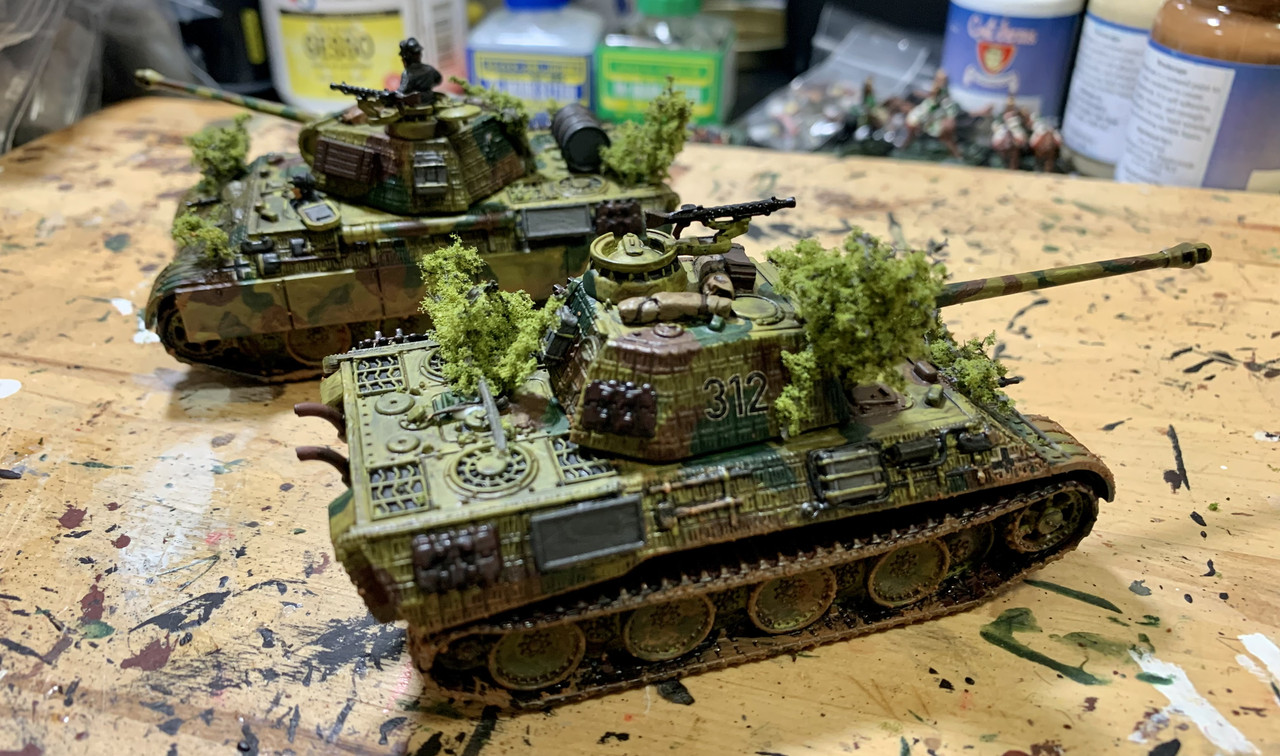
The WWII armies are the first I have built entirely myself, from scratch, for this project. I started back in July and am feeling quite pleased with myself, with over 80 figures and 25 vehicles completed. For someone as klutzy as this hound, the PSC kits are a joy to put together, and I even survived the more fiddly Italeri and Caesar sets with (what’s left of) my sanity intact.
Using '
Chain of Command' for this game, (Too Fat Lardies' set is specifically designed to simulate infantry platoon-level tactics) probably constitutes rules abuse of the worst kind. In fact, one of the most innovative and compelling elements of CoC, the Patrol Phase, is entirely negated by the set up outlined in Grant's scenario. However, when combined with Joseph Legan's '
Platoon Forward' scenario generation system, I think it provides the ideal tool kit. We'll see....
Germans (Blue)
All German forces will start the game as blinds, categorised per '
Platoon Forward' as A (probably infantry), B (probably a weapons team) or C (probably a vehicle). Entry points and timing as per the
scenario, with all blinds moving 2d6 inches on every turn (or 'Phase' in
CoC terms) until entry of Red forces. From
this turn blinds/units may only move on available command dice as follows:
1 - Type A blind
2 - Type B blind
3 - Type C blind
4 - any blind
5 - CoC point
6 - Normal results
Units deploy as blinds until Red forces have a line of sight to them.
'Platoon Forward' normally gives a 60% chance of any blind being a unit, so I have tweaked this for the retreating main force, to reflect its 30-50% strength, by providing blinds for 100% of units and then having a 50% chance of the blind being nothing and 10% it's just a soft skin vehicle with no fighting capability. For the rear guard I have given it blinds for 140% of the listed units with the usual 40% chance of the blind being nothing. I've also adjusted things to better reflect the units I actually have in my possession. (If I roll more than two Panthers I'm in trouble, but then so are the Brits.)
Main Force
9 Type A blinds
2 Type B blinds
4 Type C blinds
4 Command dice. Force Morale of 7
Rear Guard
7 Type A blinds
1 Type B blind
3 Type C blinds
5 Command dice. Dice for Force Morale normally.
Type A Blind
D10 | Main Force | Rear Guard |
1-4 | Nothing present | Nothing present |
5 | Nothing present | LMG or Pzfaust team in Kubelwagen |
6 | Soft skin vehicle | D6. 1-4 Roll again on the Type B Blind table 5-6 Roll again on the Type C table |
7-8 | Roll again on the Type B table | Infantry squad with Junior Leader in truck |
9-0+ | Infantry squad with Junior Leader | D6. 1-5 Infantry Squad and Platoon HQ in truck 6 Platoon HQ in Kubelwagen. |
Add one to the roll if the last A Blind spotted had nothing present
Subtract one from the roll if the last A Blind spotted contained forces.
Type B Blind
D10 | Main Force | Rear Guard |
1-4 | Nothing present | Nothing present |
5 | Nothing present | Infantry squad with Junior Leader in Skdfz 251/1 |
6 | Soft skin vehicle | Pzschrek team in Kubelwagen |
7 | Roll again on the Type C table | Medium Machine Gun team in Kubelwagen |
8 | Medium Machine Gun team | Medium Machine Gun team in Skdfz 251/1 |
9 | 20mm Flak on half track | 20mm Flak on half track |
10+ | 50mm PaK with Opel Blitz tow. | 50mm PaK with Opel Blitz tow. |
Add one to the roll if the last B Blind spotted had nothing present
Subtract one from the roll if the last B Blind spotted contained forces.
Type C Blind
D10 | Main Force | Rear Guard |
1-4 | Nothing present | Nothing present |
5 | Nothing present | Platoon HQ in Skdfz 251/10 or Skdfz 250/9 |
6 | Soft skin vehicle | Platoon HQ in Skdfz 251/10 or Skdfz 250/9 |
7 | Skdfz 251/1 | StuG III |
8 | Skdfz 250/9 | StuG III |
9 | SPG | PzV |
10+ | PzV | PzV |
Add one to the roll if the last C Blind spotted had nothing present
Subtract one from the roll if the last C Blind spotted contained forces.
Rear Guard will select Platoon HQ the first time that option comes up. Subsequent rolls will take the alternative unit.
British (Red)
The pursuing force is from the Recce Regiment of an infantry division, it being the only mobile formation available to the British commander following the successful infantry assault on the German defensive line.
1 Humber MkIV Armoured Car with Senior Leader
2 Car Patrols each of 1 Humber MkIV Armoured Car and 1 Humber MkIII Light Recce Car, both with Junior Leaders
1 Carrier section with 3 Carriers, Junior Leader
2 Rifle sections in 2 M5, Junior Leaders
1 6pdr with Loyd Carrier, Junior Leader
5 Command dice. Dice for Force Morale normally.
I will apply the Adjutant rule to the Brits, so they can bring on units without dicing, even after the Senior Leader is on the table. Given that they are organic to the Recce Squadron, I will allow the Senior Leader to activate the infantry and for that matter the 6pdr as well, even though technically it’s a regimental asset.
Pre-deployment
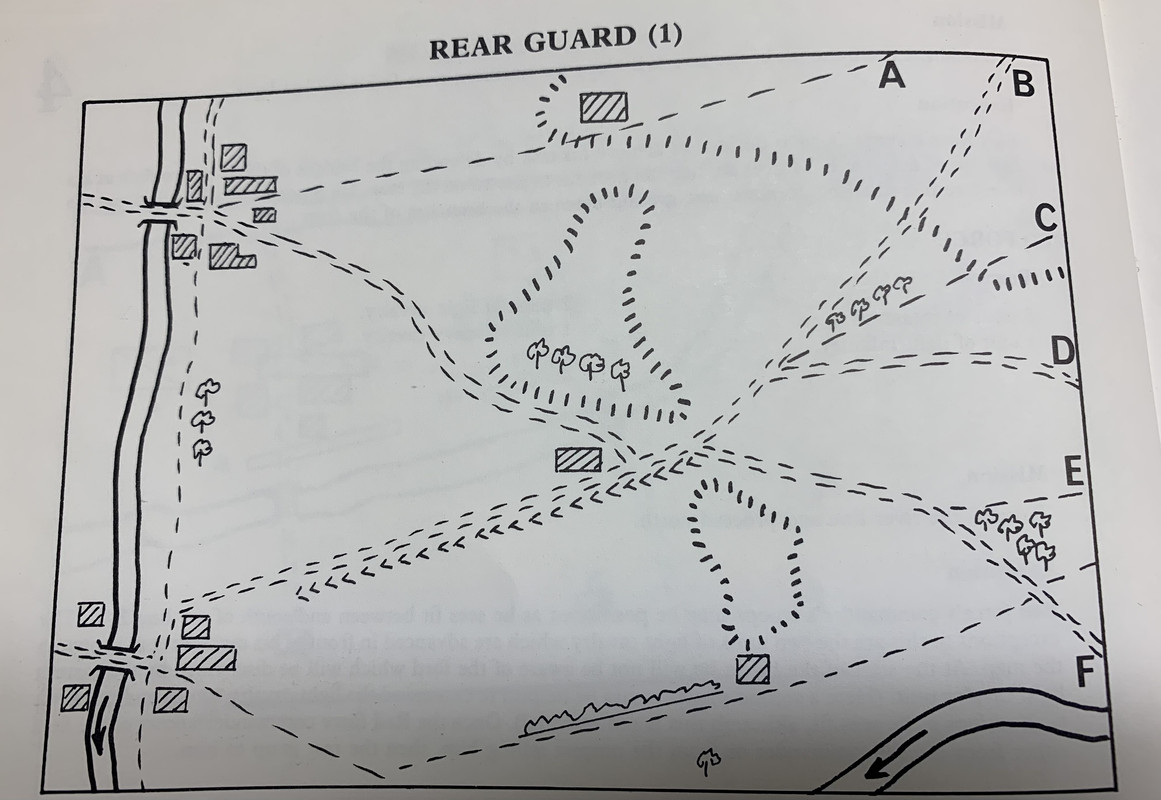
The map looks like this...
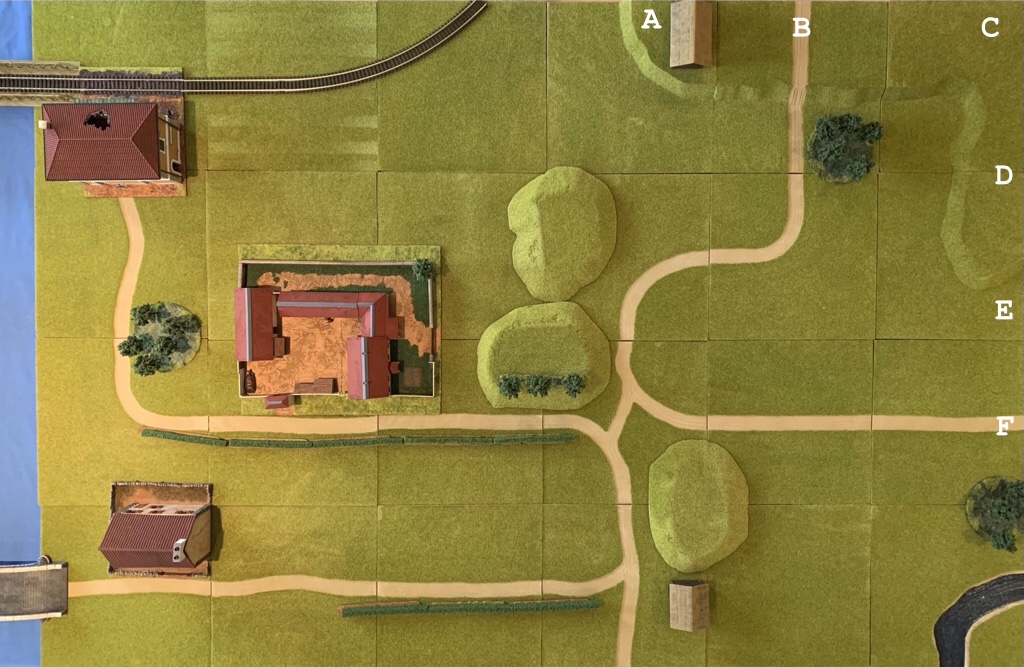
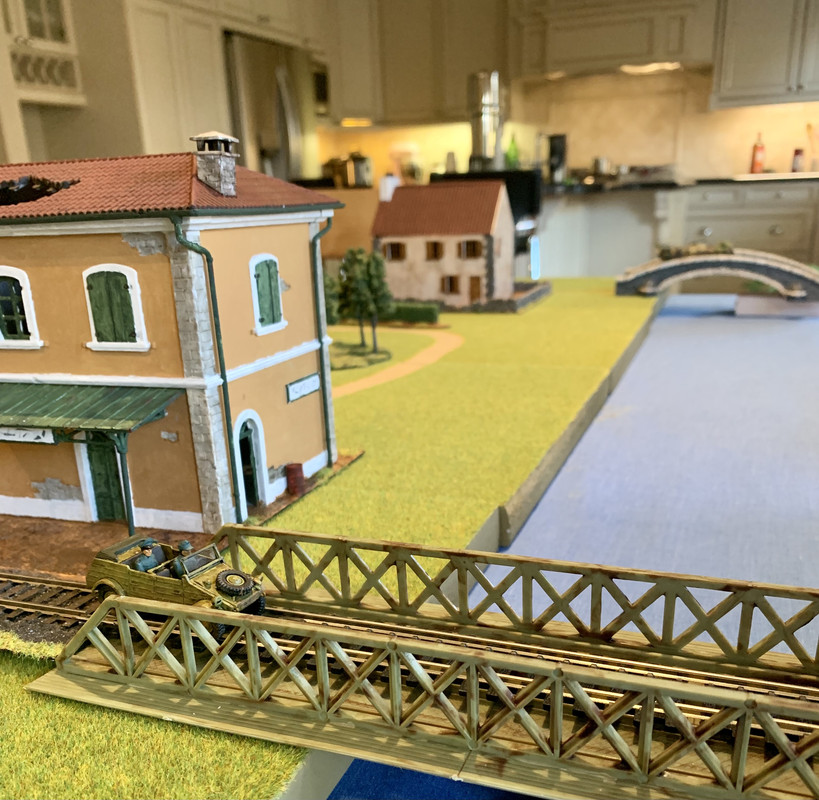
...and my table looks like this:
One of the bridges is now a rail bridge as an excuse to use my spiffy Italeri station (and to conceal my lack of a second 1/72 road bridge).
Before the game begins, you roll to see in which turn and at which entry point the German blind or British unit enters (the German rearguard can choose their points of entry). Having done the rolling, the schedule looks like this:
Phase | German Main Force | German Rear Guard | British |
1 | Entry F: A Blind Entry B: C Blind |
|
|
2 | Entry A: A Blind, B Blind Entry B: B Blind, C Blind |
|
|
3 | Entry E: A Blind |
|
|
4 | Entry C: A Blind Entry E: 2 x A Blind |
|
|
5 | Entry B: C Blind Entry C: 2 x A Blind Entry F: C Blind |
|
|
6 | Entry D: A Blind |
|
|
7 |
| 2 x A Blind |
|
8 |
| 3 x A Blind 1 x B Blind |
|
9 |
| 2 x A Blind 3 x C Blind |
|
10 |
|
| Entry B: Car Patrol |
11 |
|
| Entry A: Snr Leader Entry E: Inf Section |
12 |
|
| Entry D: Inf Section |
13 |
|
|
|
14 |
|
| Entry B: 6 pdr Entry D: Carrier Sec |
15 |
|
| Entry E: Car Patrol |
Force Morale for both the Rear Guard and the British was 11.
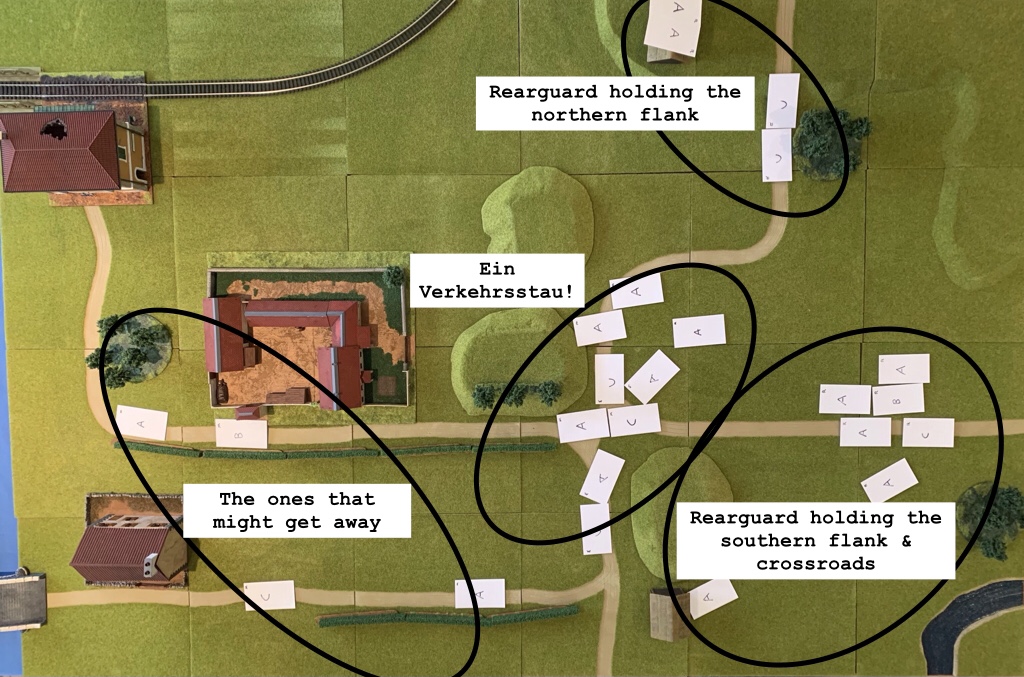
Once we hit Phase 10 when the first British unit enters, it's time for the game proper to start. German forces look like this:
Two blinds have already made it off the table, having entered at ‘A’ and hurried along the rail track. I roll for them as they will count towards the victory conditions, but both come up blank, so all German forces are still on the table.
Four blinds are well on their way to exiting, but the rest have got themselves snarled up in a massive traffic jam at the crossroads. Meanwhile, the rear guard has got a couple of ‘A’ blinds in the hut on the northern flank, another in the hut to the south, and a substantial force headed for the crossroads to form a blocking position there that can then fall back on the farmhouse complex.
With four German blinds so close to the entry point of the first British Car Patrol, I figured I needed to roll for them before the British actually came on table. This resulted in the hut being held by an infantry squad with the Platoon HQ (and its Panzerschreck) and a truck. On the road south were…two blanks.
Now, because of its multiple short phases and variable turn length, CoC can be confusing to describe blow-by-blow. If you want to see that done well, go look at
The Tactical Painter blog. Mark does an amazing job of describing the game play in detail while keeping up the narrative thread and excitement. I think that’s a little beyond me, so I’ve summarized the action, only relating the details of gameplay where it’s relevant to the story.
Turn 1
Phases 1-4: The first British Car Patrol deployed and immediately opened fire on the hut occupied by the German rifle squad and platoon HQ, to no great effect. When the Troop Commander deployed behind the hut he had more success, eventually killing 4 members of the rifle squad who were in the open. But the Panzerschreck team was much more effective, first destroying the main gun on the Patrol’s armoured car, before knocking it out completely with the next round, and inflicting the same fate on the LRC.
First blood to the Germans
Out of ‘schreck rounds, and with the armoured car to his rear inflicting casualties, the German Platoon Leader ordered the surviving troops into their truck.
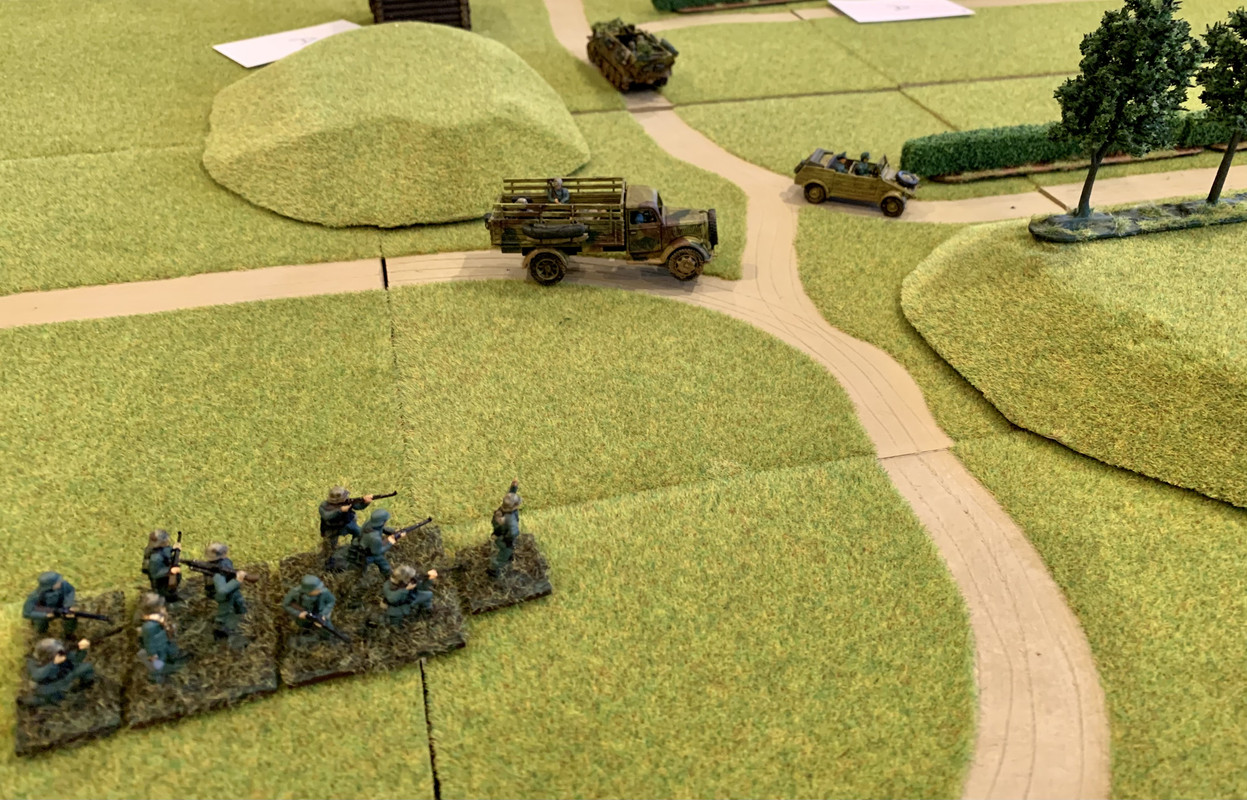
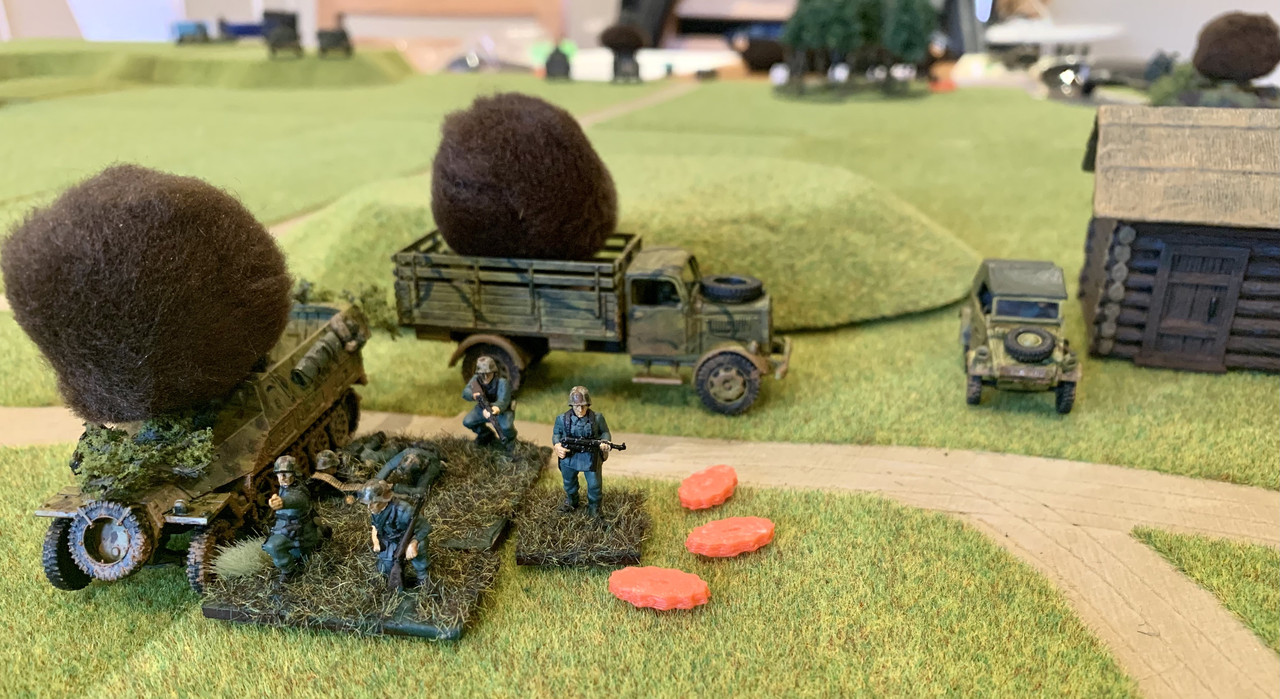
Elsewhere, two British infantry sections had arrived on the scene and identified the traffic jam as consisting of a Kubelwagen, a truck, an Sdkfz 251/1 and an infantry squad on foot (no doubt because the vehicles were full of looted artwork).
With the blanks removed, the traffic jam looks more manageable
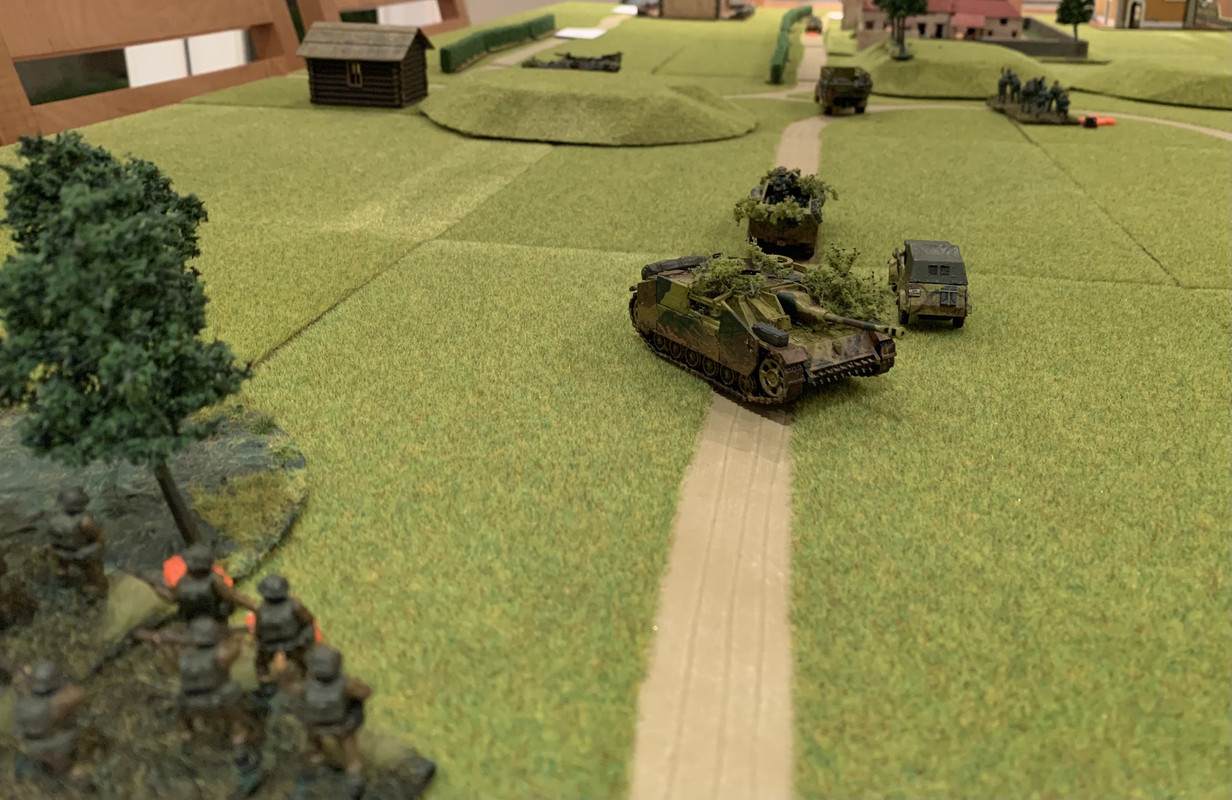
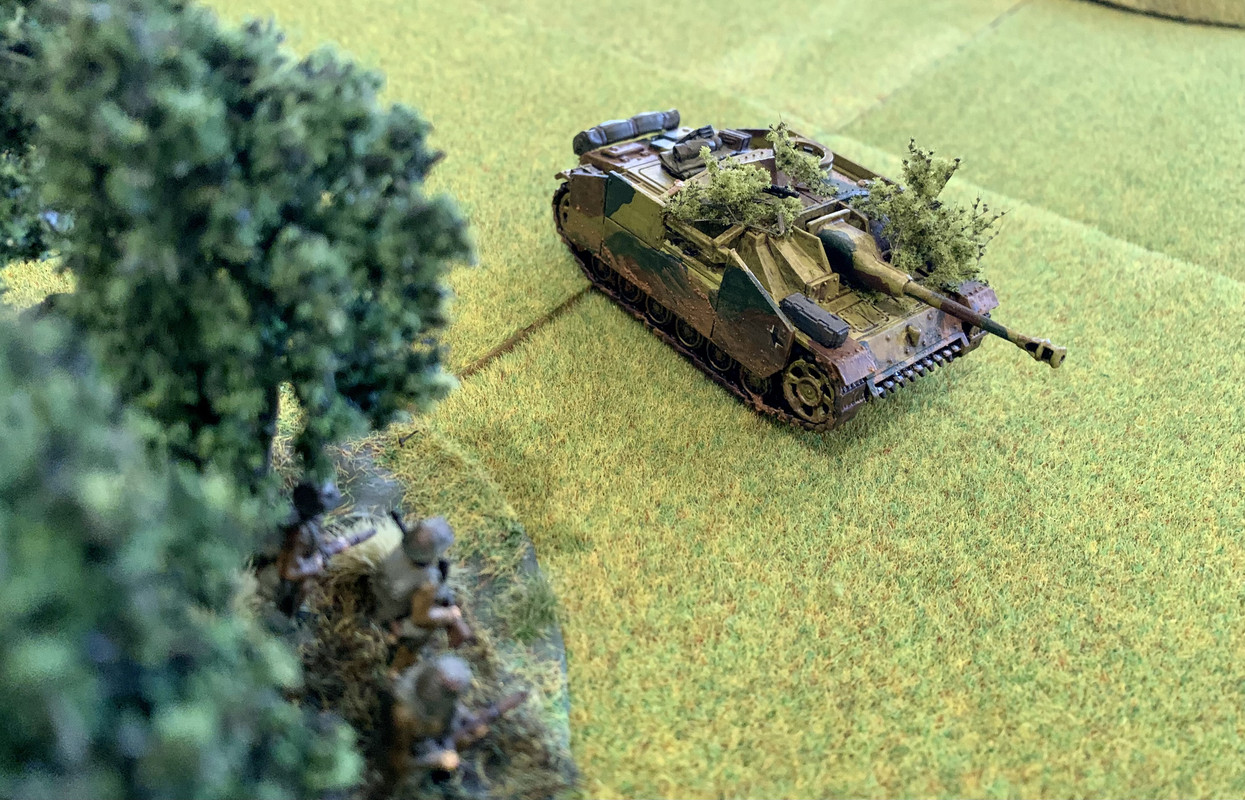
The rearguard elements were another Panzerschreck team in a Kubelwagen, an MMG team in a 251/1 and a StuG III, which was a lot of anti-armour capability for the light recce to face.
The Rearguard packs a lot of punch
The British infantry section on the hill opened fire on the Germans on foot, inflicting a casualty and some shock, while the other Section ran for cover in the woods to their south as the StuG turned to face them. So instead it machine-gunned the section on the hill, killing three of them. The rest of the German rearguard decided to avoid the traffic jam at the crossroads and make their stand at the hill on the southern flank.
Phases 5-7: The odds improved slightly for the British with the deployment of the Carrier platoon and the 6pdr, but the repeated inability of the both the 6pdr and the Carrier platoon’s PIAT to penetrate the StuG’s armour made this a bit moot. The StuG responded by wiping out the PIAT team and its NCO with its machine gun, dropping British Force Morale to 8.
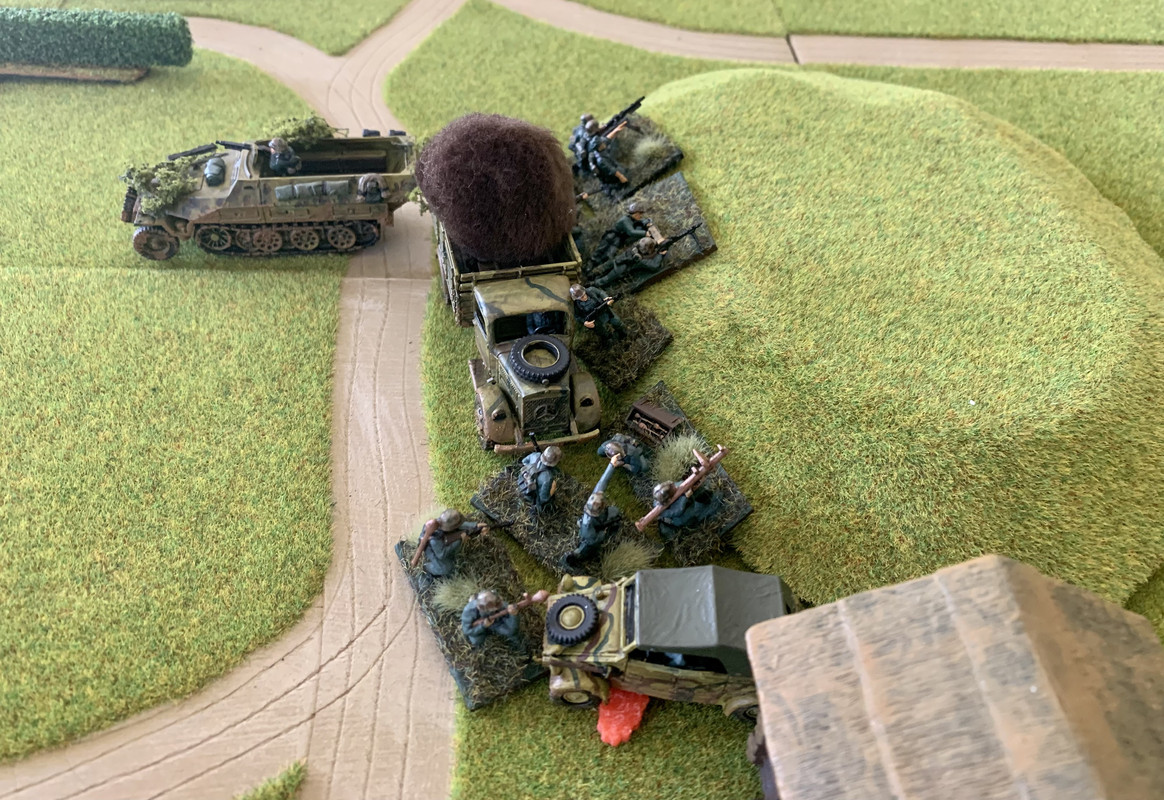
The British Troop Leader got a shot off at the truck carrying the German platoon leader as it headed south, and hit, but failed to do any damage. Quite an achievement firing 37mm rounds at a truck. When he managed to get another round off, he destroyed the truck and killed two of its passengers, but neither was the platoon leader, who was now able to consolidate his blocking position on the southern hill with a Panzerschreck, an MMG, an LMG and a StuG still on the prowl in front of them.
The German blocking position
The only bright spot for the British was that as the second Car Patrol deployed on the eastern road a Panzerschreck struck the armoured car but failed to penetrate its armour. Not that the armoured car had any more success firing at the apparently impregnable StuG.
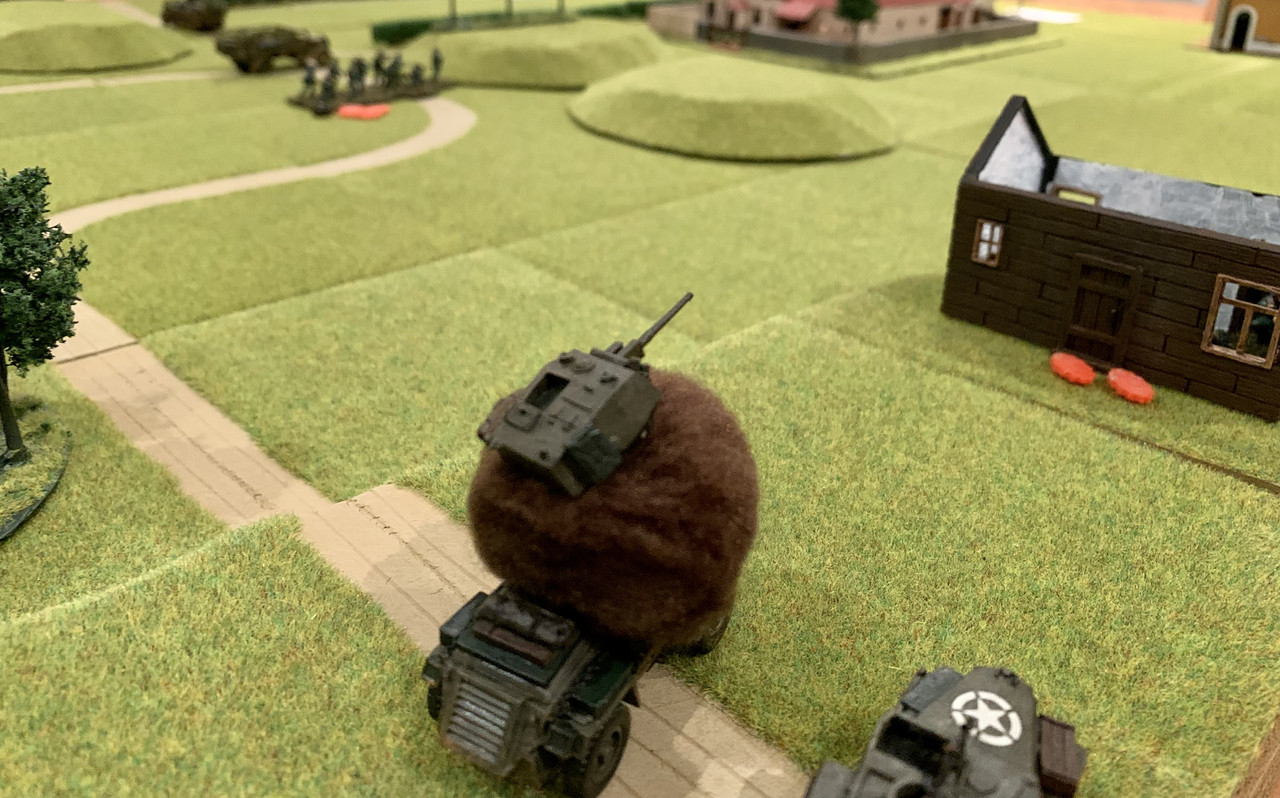
Maybe it’s the foliage, or maybe it’s the Schurtzen, but this thing was unkillable… until it wasn’t
Turns 2-4
Turn 1 ended as the Germans rolled 3 6’s, giving them the first phase of the next turn too, and they made good use of it. The StuG immobilized the British armoured car before the Panzerschreck put it out of action for good. The combined fire of the two machine guns on the southern hill was enough to drive off the remaining LRC.
But that was about as good as it got for the Germans. The Main Force finally got another A blind off the table, only for it to be another blank, and then the British put together a run of die rolls that saw them have 5 phases interrupted by just a single German phase. This allowed the British rifle section in the woods to start to win the firefight, whittling down the German machine gunners. The 6pdr, after repeated attempts, finally penetrated the armour of the StuG and knocked it out. It then joined the Troop Leader’s armoured car in firing on the German position from its northern flank. This saw the MMG team and Panzerschreck team wiped out, and so the Platoon Commander ordered the survivors into the 251/1 to make a run for it.
The Rear Guard had at least served its purpose, for while all this was going on, the Main Force had been edging its way towards the bridges. The rifle section on foot, having taken some casualties from British fire, caught up with a truck, which they boarded (later swearing blind that it was empty and that they would never have left a heap of crated artwork by the roadside). A blind made it off the table and was revealed to be another rifle squad, and then the Kubelwagen, 251/1 and truck all made it off too.
A senior officer makes it to safety, but what about his looted artworks?
The last few phases of the game were like something out of Mad Max meets Wacky Races. With all the survivors of the Rear Guard in the 251/1, the British Troop Leader fired a 37mm round at the half track and knocked it out, killing one passenger. Under cover of two burning vehicles, the German Platoon Leader ordered the survivors into the Kubelwagen, a tight squeeze for five of them.
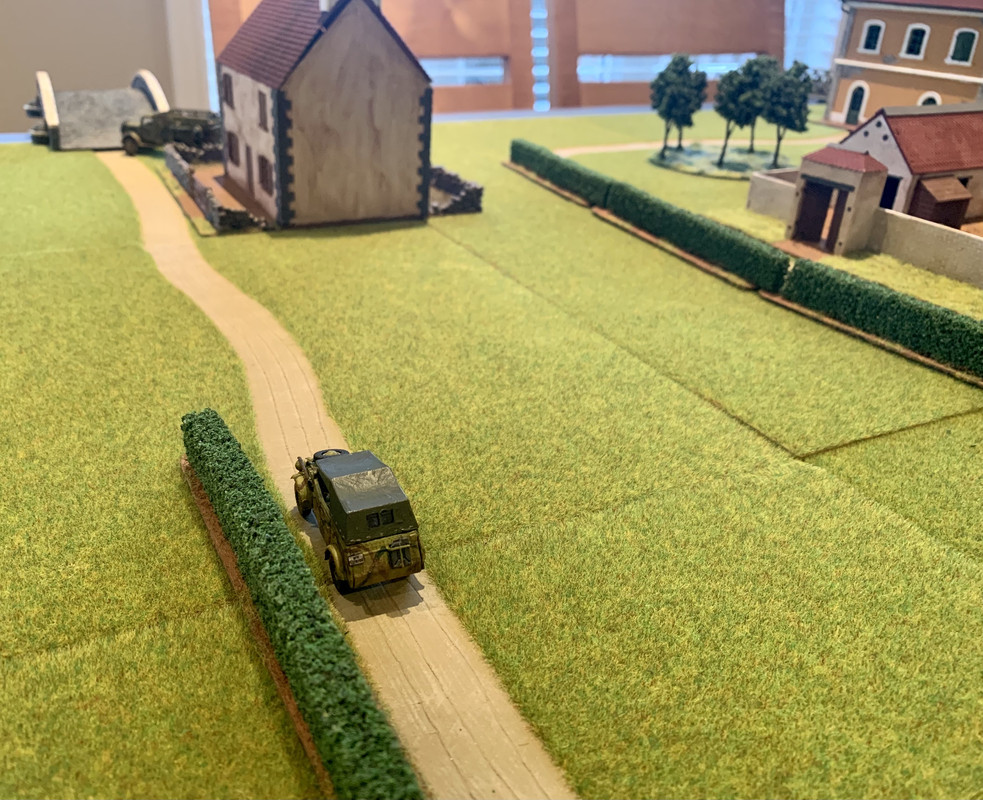
“Scheisse! Right lads, time for Plan C, into the Kubelwagen.”
They then took off at speed for the road bridge. The Recce Troop Leader gave chase, with round after round of 37mm missing the target. As the German car crested the arch of the bridge, a shell finally hit home…and knocked off a wing mirror. The Germans escaped.
“We’re 24 inches from safety, it’s daylight and none of us are wearing sunglasses. Hit it!”
Conclusion
The entire German Main Force got away, apart from a couple of riflemen, but the Rear Guard lost 75% of its manpower and all its vehicles, except for that overloaded Kubelwagen. Technically this makes it a draw by Grant’s criteria, but given the Brits lost a third of their infantry and 3 armoured vehicles, I think the Germans had the better of it.
It was so great to have my WWII forces on the table. I enjoyed building the kits, but seeing them in action is what makes it really worth it. I’m particularly fond of the train station, so it’s a pity that the fighting was all down the other end of the table. Which brings me to one of my disappointments with the game: I didn’t get to play with enough of my toys! I’m not sure the German forces were smaller than the tables would generate on average, but I didn’t get to use my Panthers (for which the British must be grateful) or the armoured cars. Even the British, who had a fixed force, did not deploy the M5s or the Loyd Carrier I had lovingly built, and the Bren Carriers barely featured. I’ll fix that with the next scenario where the German forces will be a little more predictable.
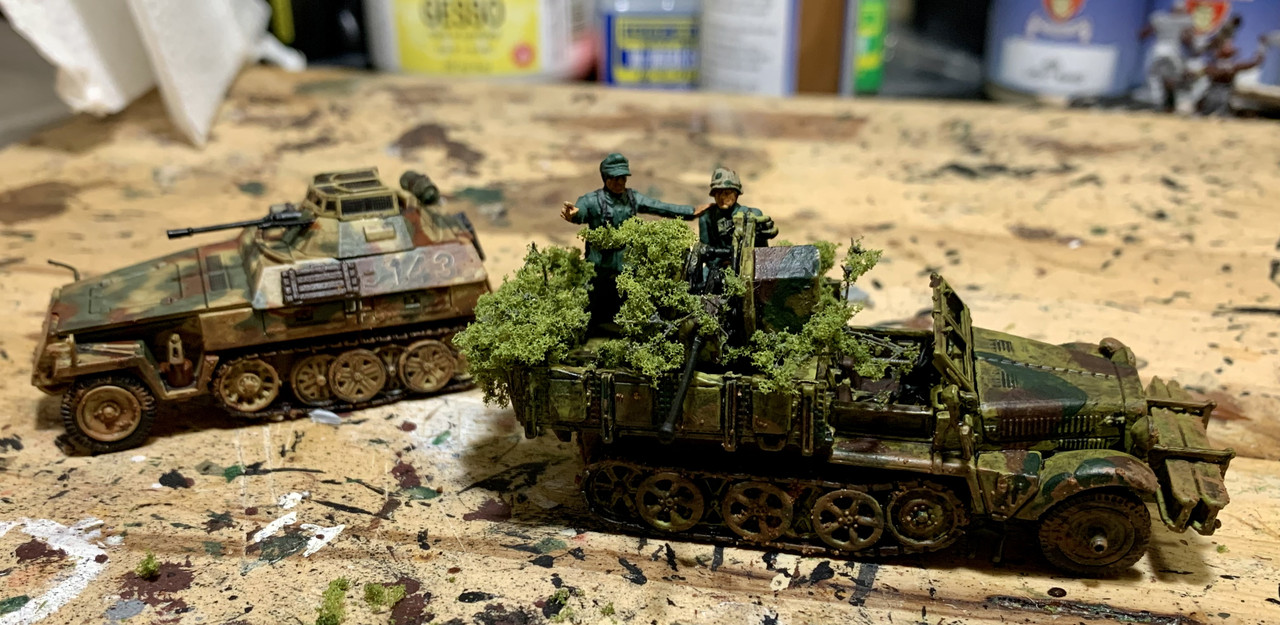
The ‘impressive bush’ conceals an appalling botch job on a very fiddly Caesar kit.
I also found the slightly choppy nature of CoC a bit frustrating. It does not generate a smooth narrative and plans are repeatedly frustrated by the run of the dice. Which is to say, it is very realistic, so I shouldn’t complain. Also, I didn’t notice this so much when I used them to play my Vietnam campaign, so maybe it’s the fact that I played this scenario in short bursts over 4 days that is really to blame. If I were to play this scenario again, I might spend more time figuring out how to do the deployment. I just applied Grant’s instructions straight from the tin, and maybe the Rear Guard didn’t get far enough before the Brits arrived, but by the end of the game I felt things had turned out realistically.
So, as hinted at above, I’ve enjoyed this so much that I’ve decided to do Scenario 11 with these armies instead of the Inter War lads. That requires me to increase my British infantry from the current 2 (motor) sections to 2 (leg) platoons and add a couple of Shermans. Next up on the game front will be a big Ancients clash, as the Byzantines take to the table for the first time. No idea when that will happen, but with 3 games already on the blog (not to mention a game of CoC with PatG when I dropped in on him in Ottawa and a game of Rapid Fire at the Hot Lead convention in March) it’s been a pretty busy year already.
Well done and the table looks terrific! I published an article in the Christmas 2013 special about how to use PlatoonForward with CoC but it looks like you have done a great job. To get the right flow when you bring in a blind bring in 2 because as you stated there is a 40% chance it won't be real. So on a "1" or "2" bring in 2 blinds instead of one. That should help your opponent get more toys on the table. Great stuff! Joe Legan
ReplyDeleteThanks Joe, your article was a vital resource for me, and thanks for the suggestion. I'll try that next time!
DeleteGlad to have you up here.
ReplyDelete