Armies painted (by someone else, thanks Neil and team), terrain painted (by someone else) and laid out (by me, yay me!), rules studied, scenario prepared. Deep breath. Let's go!
For this first outing I am using my 6mm Napoleonic armies with the Maréchal d'Empire rules. A few die rolls using the army generators in the back of those rules provides the following forces, as a Prussian Corps attempts to dislodge a weak French corps with supporting cavalry from a fortified position somewhere in Germany, 1813. (Note for the non-grognards: what the Prussians call a brigade is roughly equivalent to a French division, while French brigades are similar to Prussian regiments. C’mon, it wouldn’t be Napoleonics if it wasn’t needlessly confusing, would it?)
French (Blue)
1 General Decisive
1 Infantry division of 3 brigades Trained SK1, Trained SK1, Veteran SK1
1 Infantry division of 2 brigades Veteran SK1, Raw SK0
1 Cavalry division of 2 brigades Dragoons Trained
2 batteries Foot Artillery
Prussians (Red)
1 General Plodding
1 Infantry brigade of 3 regiments Trained SK1, Raw SK1, Raw SK0
1 Infantry brigade of 3 regiments Trained SK1, Trained SK1, Raw SK1
1 Infantry brigade of 3 regiments Trained SK1, Trained SK1, Raw SK0
1 Cavalry brigade of 1 regiment Cuirassiers Trained, 1 regiment Dragoons Trained
1 Cavalry regiment Uhlans Trained
2 batteries Foot Artillery
Not a great start for the Prussians, with that plodding general and a lot more Raw troops than the French. Not to mention that they barely scrape a 2:1 superiority in numbers, let alone the 3:1 that might be expected for assaulting a fortified position. Looking good for the French so far.
MdeE uses bidding with Tempo points to determine initiative. The Prussian general will get 1d6+5 points (1 per formation, none for being Plodding) and the French also get 1d6+5 (3 for the formations plus 2 for being Decisive). As a solo mechanism I will randomly determine how many points each side bids. As attackers, the Prussians will bid 1dAvg points each turn while the French will only bid 1d4. The winner is restored 2 of the points they bid and gets to move first.
The other tweak to the rules is that I have a set of random events, adapted from those in Grant's companion volume 'Programmed Wargame Scenarios'. They are mostly of relatively minor impact, and my current mechanism gives a roughly 40% chance of at least one being drawn per turn. That may be too frequent, but I find solo games benefit from more of this kind of disruption than when playing a live opponent.
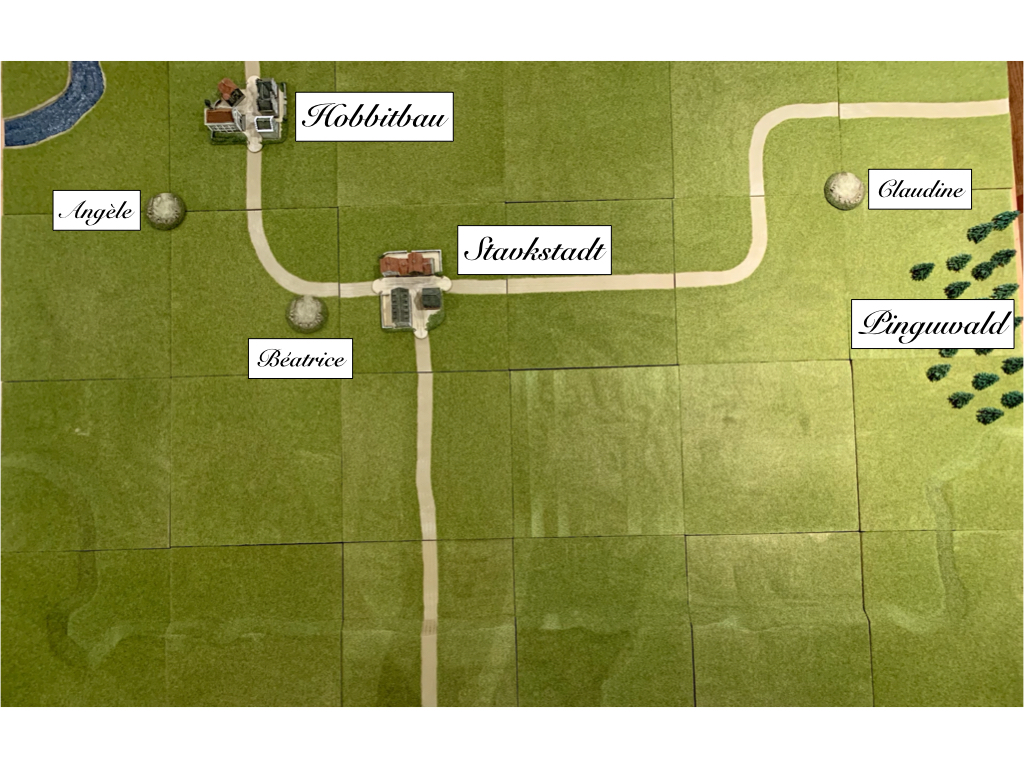
This is what the original map shows, with the Blue forces (the French) defending the line BAC while the Red forces (Prussians) deploy on the line XY

And this is what it looks like when transferred to my table. The addition of roads and the southern ridge is simply because I don’t have enough plain tiles to reproduce the map, but I have to say the roads seem logical. The place names (and those of the commanding generals) pay tribute to some of my friends from The Outpost forum, while the redoubts prefigure Dien Bien Phu by being named after young women of the French general’s, ahem, acquaintance.
Background
During the 1813 campaign in Germany, Napoleon’s northern flank, the city of Hamburg, was held by the dullest but most competent of the marshals, Davout. (My reasons for choosing this particular theatre will be come clear with Scenario 6.) Here we find a weak corps of 3 divisions, dispatched by Davout to delay the Allied advance, under the leadership of General Michel Lebasque. Having reached this rank in the Spanish theatre, thereby avoiding the horrors of the Russian campaign of 1812, the general’s wiliness had earned him the sobriquet ‘le félin diabolique’. He remained mystified as to why this had caused his British enemy to greet his appearance on the field of battle with cries of “Ooh, Mrs Slocombe!”
The French right flank was anchored on a river and the two towns of Hobbitbau and Stavkstadt, the left flank resting on the impenetrable forest of the Pinguwald. The position was further reinforced by 3 redoubts, although the French only had enough guns to equip two of them. ‘Le félin’ remained unconcerned at the appearance of Prussian forces before his position. Not only did they seem insufficient in numbers to trouble him that day, but his spies assured him that they were led by the Baron von Wreckedoffen. What a Bavarian was doing in the service of the King of Prussia was anybody’s guess, but it was almost certainly the result of losing a bet, and the Baron’s improbably bad luck with dice was well known to extend to the battlefield.
Lebasque used the two brigades of his weaker division to occupy the towns, the Raw brigade furthest back in Hobbitbau. The three brigades of the other division held the road running east from Stavkstadt with their flank secured by the cavalry division. Not wanting to have a battery exposed on the distant left flank, le félin placed his two batteries in the redoubts defending the towns, leaving Claudine undefended. (It was only after drawing up this plan that I checked Grant’s victory conditions, and found these amounted to the winner was whoever controlled 2 out of the 3 objectives: the two towns and Claudine. So the French now had to hold both towns at all costs.)
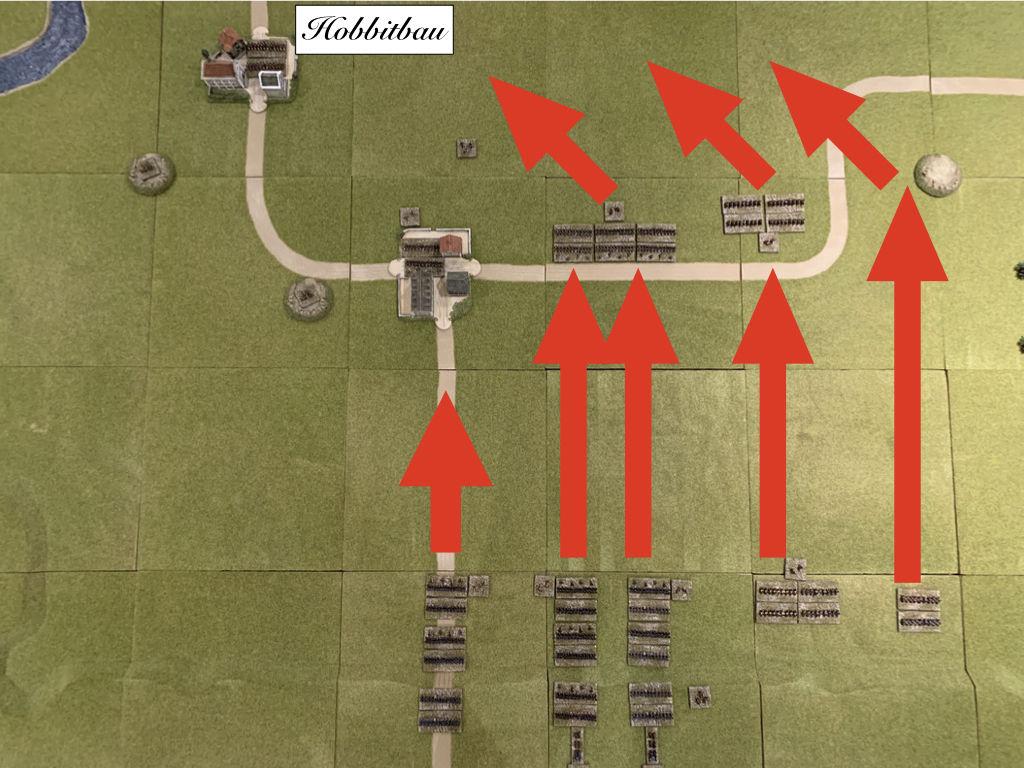
Even to the slow-moving brain of the Baron, the challenge of seizing the well-defended towns was obvious. So he planned to use his weakest brigade to demonstrate in front of the redoubts and Stavkstadt in order to pin the defenders, while his other brigades overwhelmed the enemies centre and his cavalry cleared their opposite numbers from the flank. A simple plan by a simple baron. What could possibly go wrong?
A simple plan
Turns 1-3
The Prussians won initiative for the first three turns, and the first two of those were spent accumulating enough Tempo points to get the large brigade columns moving towards the French line. With their artillery out of range, there was little the French could do but await the coming storm, which broke in Turn 3.

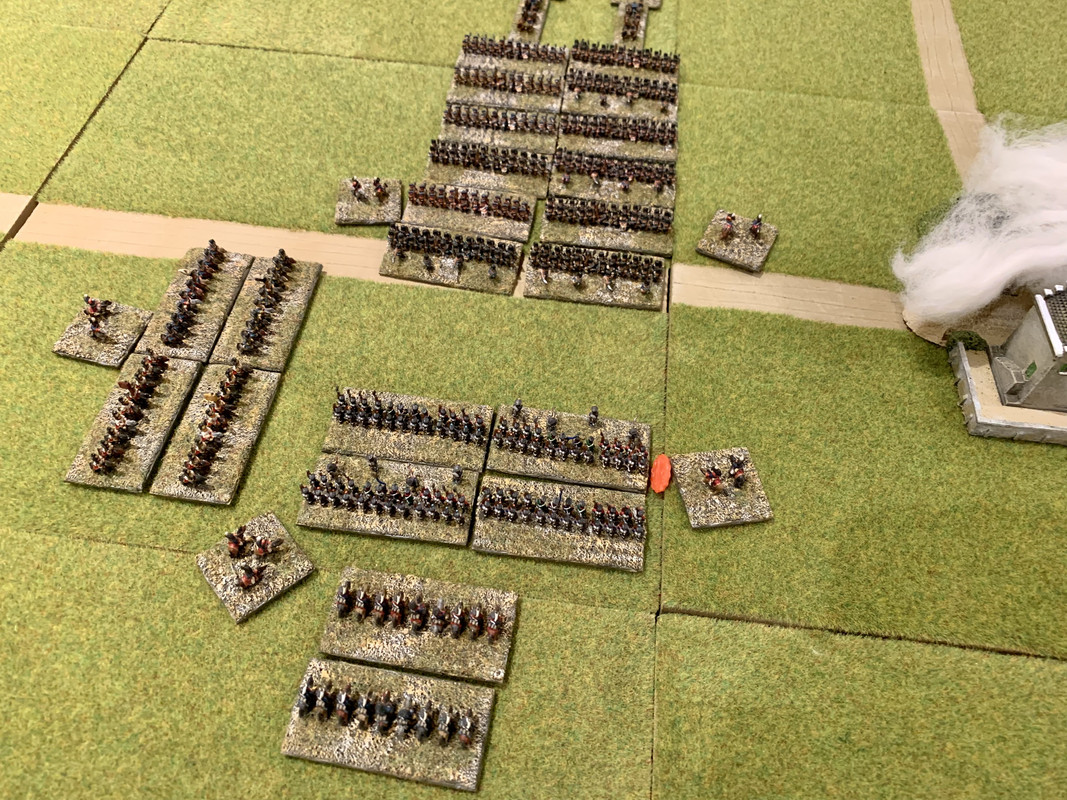
Prussian force mass for the attack
A chance card gave von Wreckedoffen a flash of inspiration (or possibly a twinge of indigestion) and with the help of the 2 extra tempo points this gave him, he launched his right and centre brigades into the French line on the road east of Stavkstadt. The centre brigade was initially held by its Veteran opponents, and then pushed back. The crush of men in the long column prevented the lead regiment from falling back and the whole brigade became shaken. On the right things went better for the Prussians, with the lead regiment pushing their opponents back before putting them to flight. However, the disarray of the centre brigade outweighed success on the right, and both columns fell back to their starting points to recover. (In MdE once the four rounds of combat have taken place, an Outcome roll determines which side retires. With 4 shaken units the Prussians rolled at +4 while the single broken unit on the French side gave a +2.)
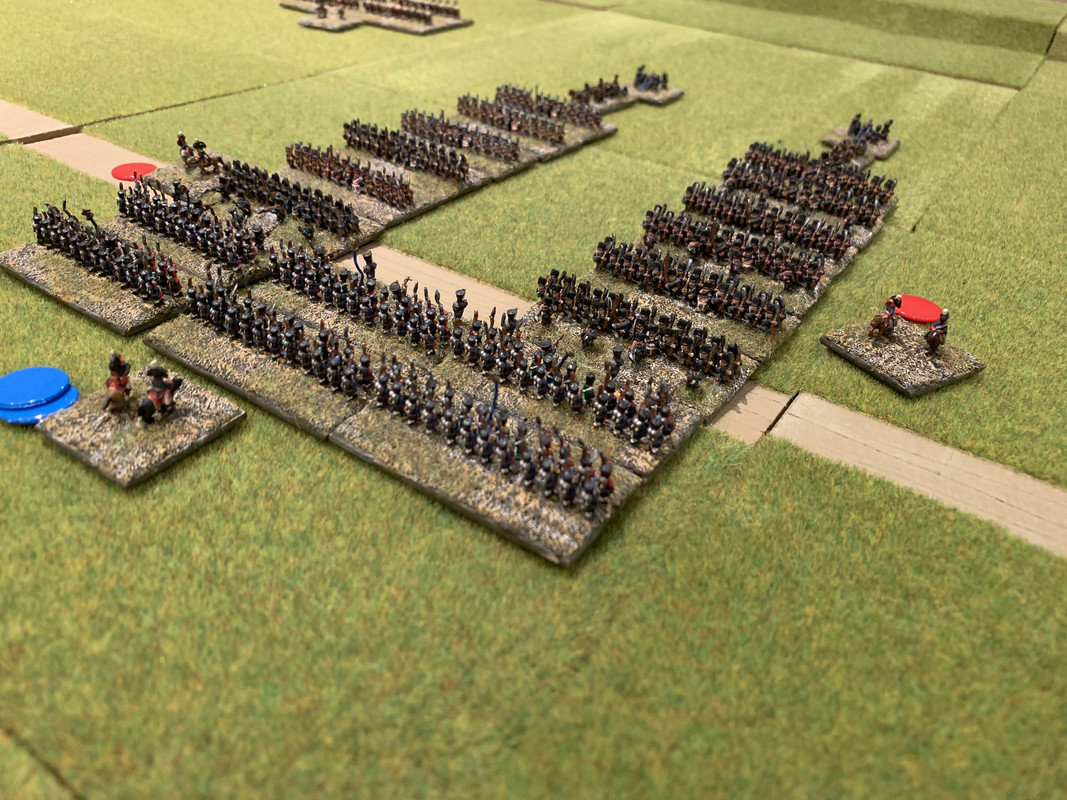
View of the first combat from the French lines
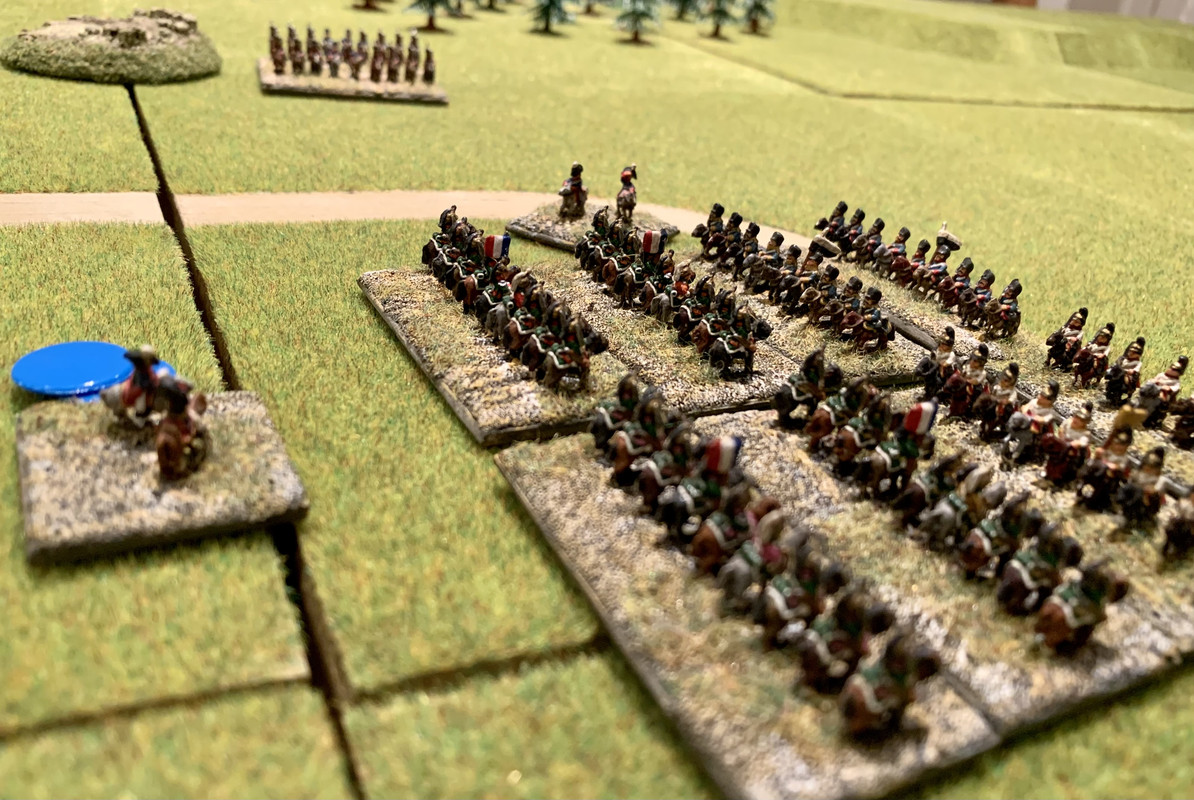
In the French phase le félin realized that despite repulsing the first Prussian assault, things might not be as rosy as he had imagined. His dragoons were effectively pinned by the advancing Prussian cavalry, being unable to advance without exposing the infantry’s flank to the uhlans. Whilst it might take the Prussians a while to reorganize, they had lost no units in the melée, whilst he had lost an entire brigade and now faced local odds of 3:1. His sole action was for the guns in Béatrice to bombard the Prussian brigade approaching Stavkstadt, causing the rearmost regiment of landwehr to recoil.
Turn 4
The French won the initiative, but with both sides still recovering from the combat in the centre, there was not much Lebasque could do, other than remove some ‘shaken’ markers and reposition the artillery in Béatrice to better cover the approaches to Stavkstadt. The Prussians, for their part, might have been stymied in the centre, but switched their focus to the flanks. On the right the cavalry brigade continued to advance towards the French dragoons, while the uhlans had now circled round to the French cavalry’s flank.
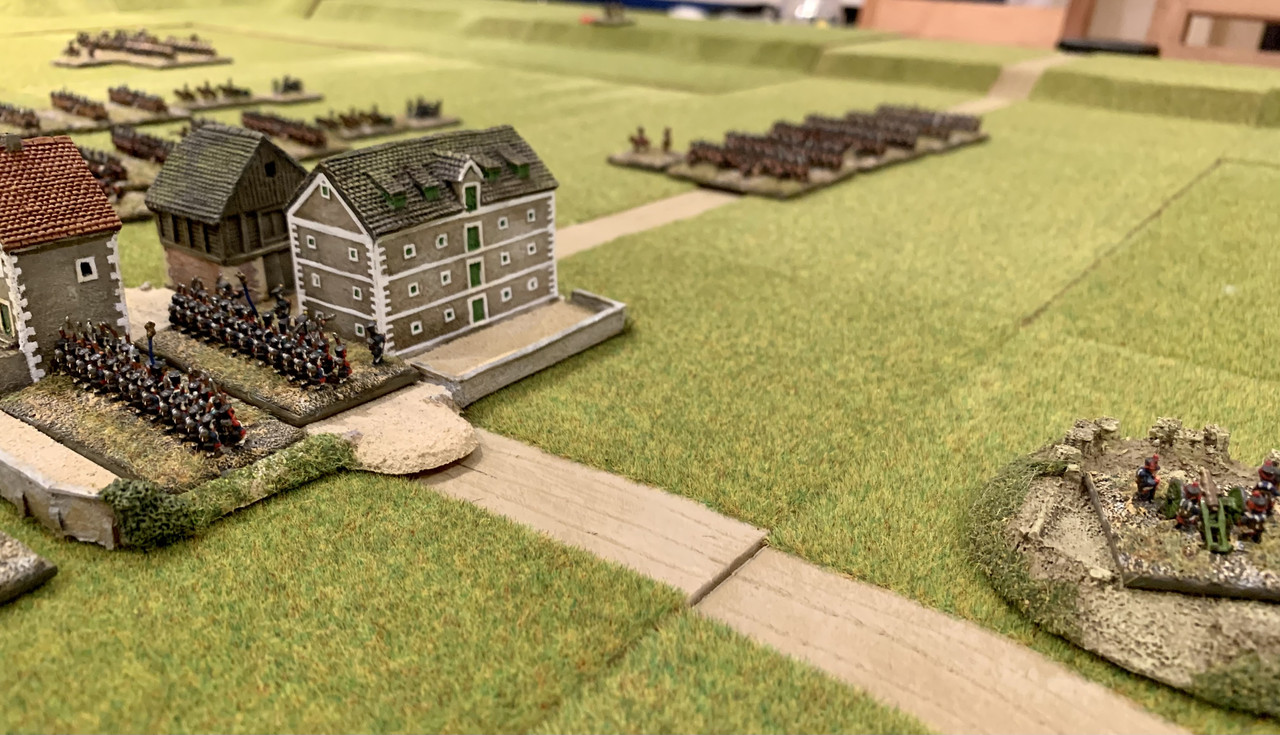
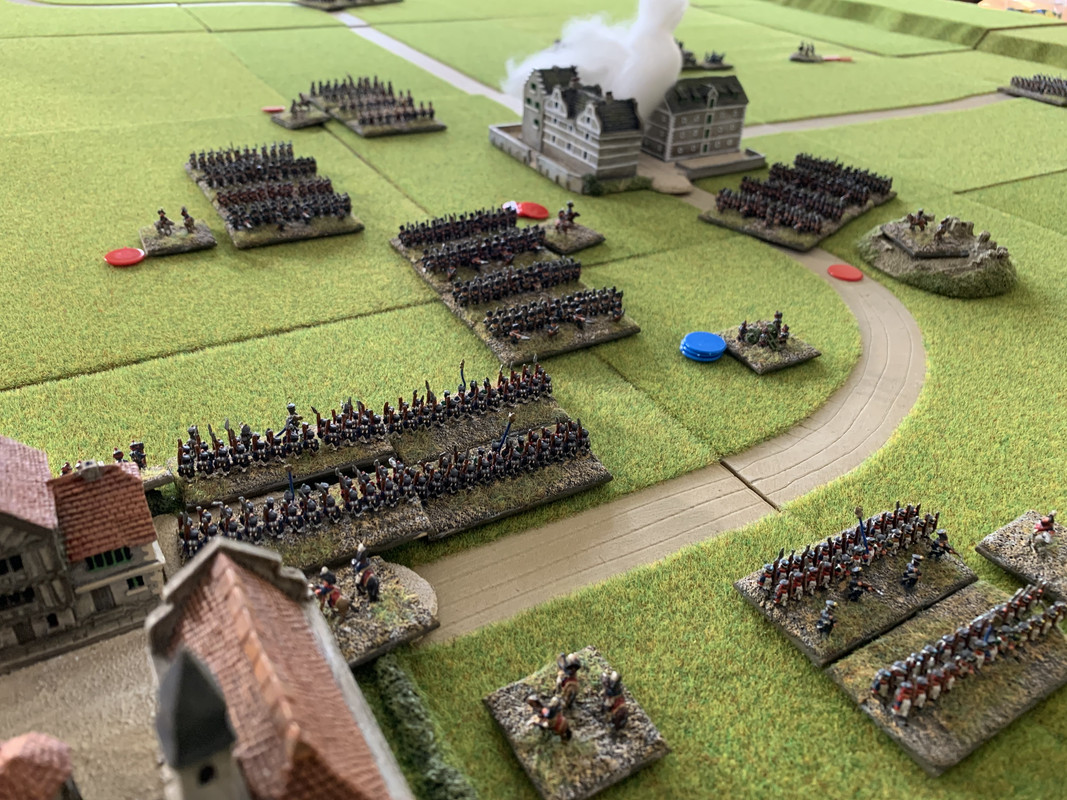
French troops in Stavkstadt and Béatrice await the Prussian assault
On the left, the Prussian infantry charged into the outskirts of Stavkstadt. Fighting raged back and forth in and around the buildings but eventually the Veteran French brigade pushed their opponents out, the Prussians retiring in good order to prepare another assault.
Turn 5
With a big cavalry clash imminent, having the initiative was vital, and von Wreckedoffen returned to his uncharacteristically winning ways. But before the charges even began, a chance card indicated that a Prussian unit had found a store of provisions and was going to spend two turn attending to their hunger. A die roll selected…the uhlans! Clearly Claudine might be unoccupied but was well stocked with food. A cunning ploy typical of le félin diabolique, or just dumb luck? Whatever it was, it spared the French dragoons from being charged in the flank.
The heavy cavalry clash! In the distance you can see uhlans filling their faces.
(The crevasses are inevitable with terrain tiles and closeups.)
In the end, this made little difference. The cuirassiers and dragoons crashed into the French horse, sending them reeling. A fierce melée ensued, the French held on for a while, but eventually momentum told and they turned and fled the field. With impressive discipline, the Prussian cavalry did not pursue them and instead regathered their ranks and prepared to threaten the flank of the French infantry.
In the face of this disaster, there was little the French could do. The artillery in Béatrice bombarded the Prussians in front of Stavkstadt, shaking them and thus delaying their preparations for a renewed assault. But then further disaster struck in the form of a chance card. A soldier in a built up area knocked over a lamp and started a fire. Quick die roll, and it was the defenders of Stavkstadt who now had to face a second, self-inflicted, threat.
Turns 6 & 7
Turn 6 saw the Prussians continue to dress their ranks, while the French defenders of Stavkstadt failed to put out the fire and the artillery in Béatrice ran out of ammunition and had to pause while fresh supplies were brought up.
Taking advantage of the temporary lull in the bombardment and the distraction of the fire, the Prussian left brigade renewed its assault on Stavkstadt. Once again the fighting, this time amongst blazing buildings, was fierce. Once again the Prussians were eventually ejected from the town, sent reeling back, shaken.
On the right, the uhlans continued to advance around the French line, now threatening its rear. Knowing what was about to come, General Lebasque joined his left flank brigade, determined to lead them in person in the coming fight.
The French are surrounded, 2 columns of infantry in front, cavalry to their left, uhlans behind.
The smoke of the Stavkstadt fire can be seen to the right.
Turn 8
With the initiative once again, the Prussians attacked the French line a second time. Their cavalry threatened the French flank and rear, but were too far away to actually participate in the combat. That proved little hindrance as both French brigades were forced back. On the right the Prussians kept up the pressure, and despite General Lebasque’s efforts the French infantry, now trapped between Prussian infantry and the uhlans to their rear, surrendered en masse. Le félin diabolique only escaped thanks to his fine horse outrunning the lances of the uhlans. (A good roll on the ‘risk to generals’ table.) The veteran brigade on the French right fought back fiercely, pushing their opponents back, but it was to no avail. With their comrades throwing down their muskets surrounded by Prussian cavalry, they were forced to break contact and withdraw.
With 4 units broken and 1 shaken, the French were on the verge of failing a Force Morale test. Only a 1 or 2 on a d6 would save them. They rolled…a 1! Le félin had used up another of his 9 lives, but the battle would continue.
Turns 9 & 10
The Prussians regrouped after the combat and began to organize an advance on Hobbitbau. Lebasque desperately tried to organize a new battle line, pulling the Veteran brigade out of the still blazing Stavkstadt, the artillery from the redoubts and the brigade from Hobbitbau, which having helped itself to the contents of the town’s kitchens and bakeries was now rated Trained rather than Raw. (Another chance card.)
Turn 11
With dusk falling (Mrs Dog really wanted the kitchen table back), Lebasque had one last chance to save the day. He won the initiative and continued to pull together his remaining forces into a coherent formation.
It was too little, too late. A Prussian brigade smashed into the defenders of Stavkstadt as they tried to join the battle line. Out of formation, they were forced back and broken, and this was enough to break the morale of the whole French force. Lebasque did his best to save what he could of his troops in the failing light, grateful that the Prussians seemed too exhausted to pursue him closely.
Defeat. Lebasque and his aides are centre foreground, with the broken brigade to his right taking his last hope of victory with them. In the distance, three columns of advancing Prussians.
The Baron von Wreckedoffen had won a famous victory. Without losing a single unit he had seized all three objectives and routed the French. Ironically, a lot of that came down to the luck of the dice. The Prussians didn’t have it all their own way, but when the crucial combats occurred, they rolled the dice they needed. But to the Baron’s credit, his plan worked. The French found themselves pinned, unable to respond and battered into submission by superior numbers.
Concluding thoughts
Quite apart from my delight at having finally, after years of anticipation, got the project underway, I really enjoyed this game. The end result seems one-sided, but that was never clear until the latter stages. Both initial Prussian assaults were repulsed and the uhlans got distracted at a very inconvenient time.
It has been a while since I have played MdE, and there were a few learnings, plus some crucial things I had either forgotten or never knew:
- Never attack in a formation more than two units deep. The chaos when a recoil result ripples down a longer column can be disastrous. The Prussian were lucky the French were in no position to follow up when that happened to their first attack.
- I have never figured out how to make artillery work at this scale. The Prussian guns never fired a shot and the French were rarely in range and pointing the right way. This is not the fault of the rules. Glenn Pearce and Ron Volke regularly blasted my attacks to pieces with well deployed artillery at the NMWST when we used MdE. I’ll just keep trying to figure it out.
- I really do like the way the multi-phase combat resolution recreates the ebb and flow you find in contemporary accounts of Napoleonic battles. By way of example, the Prussian attacks into Stavkstadt would enjoy some initial success, but never enough to overcome the defenders advantages and both times they were thrown out. This provides narrative colour to the proceedings, but the mechanism also always gives a clear result one way or the other which helps drive the story on.
- The solo Tempo bidding mechanism worked pretty well. The attackers mostly had the initiative, but the French occasionally seized it to disrupt their plans. The need to build up sufficient points to launch (or relaunch) an attack lent a realistic pace to the game. The chance cards also did not seem too intrusive, but lent some real colour and excitement, particularly the fire in Stavkstadt.
So a great game, the blog finally has its first battle report and I am eager for more. For Scenario 2, I still need some hedges, trees, a farmhouse…
Well fought by eth Prussians - overturned the historical result (Fontenoy) and with poorer quality troops!
ReplyDeleteThanks Rob, and no doubt aided by complete failure to spot which historical battle this was based on!
DeleteGreat report and superb table!
ReplyDeleteThanks Pat. The table is helped by it being all someone else's work.
ReplyDeleteLots of very nice wargame eye candy, thanks for sharing.
ReplyDeleteWillz.